Documentation Google sign in
<<< Google sign in button example
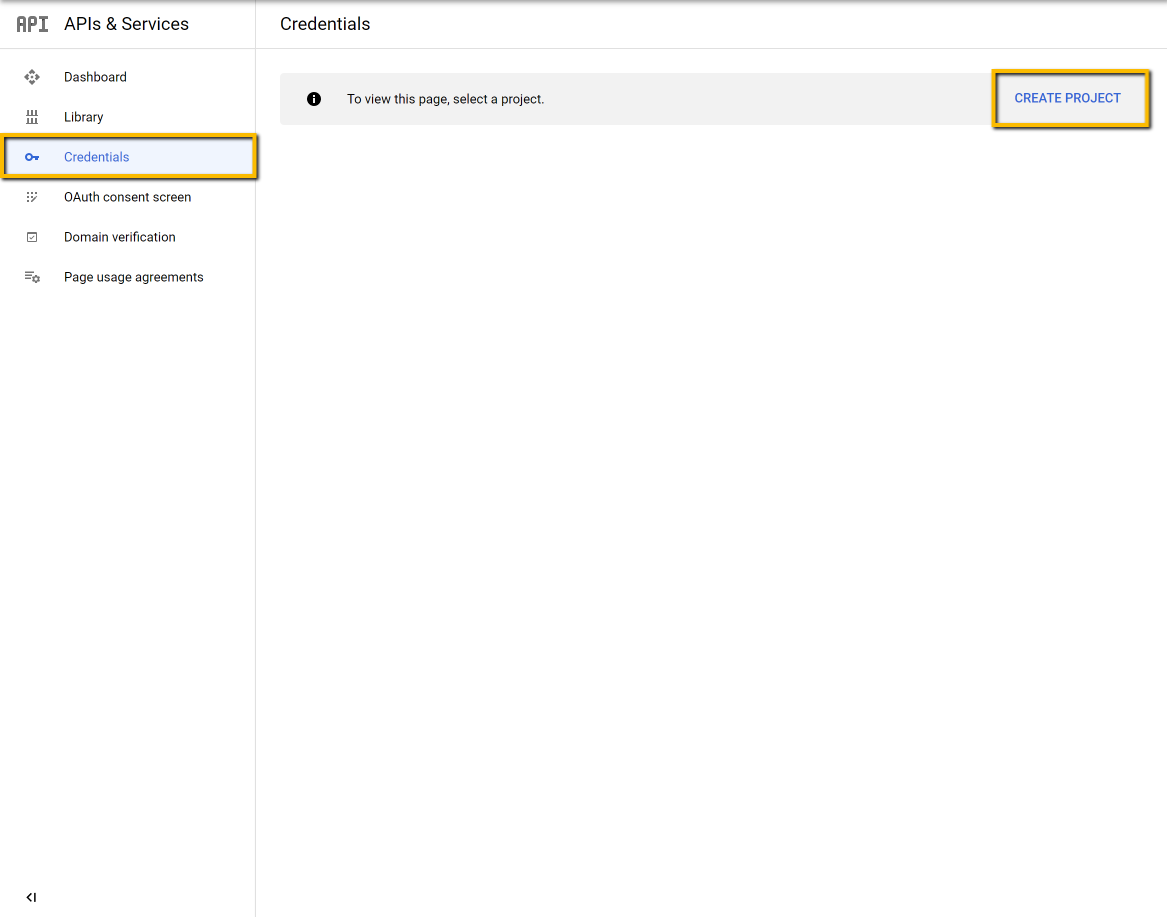
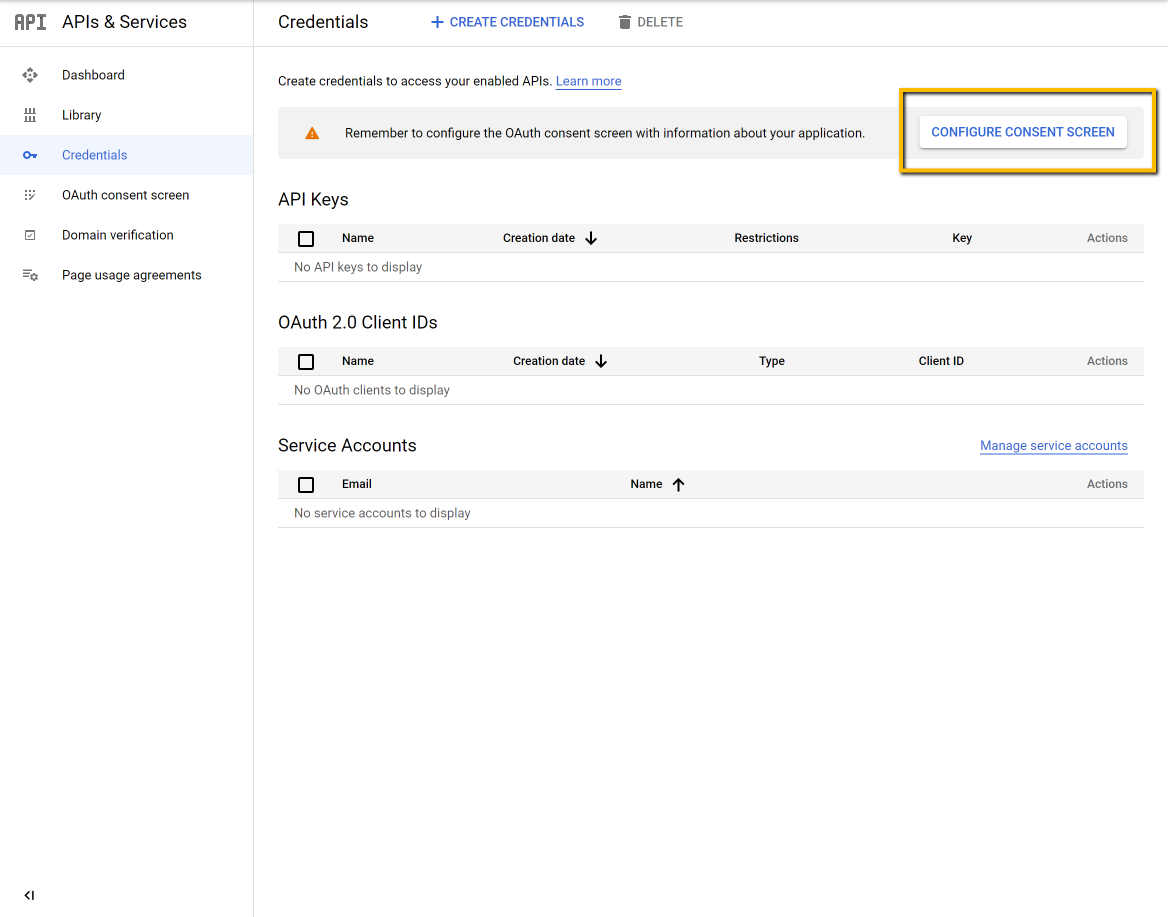
Go to Google Cloud Platform credentials page:
https://console.developers.google.com/apis/credentials
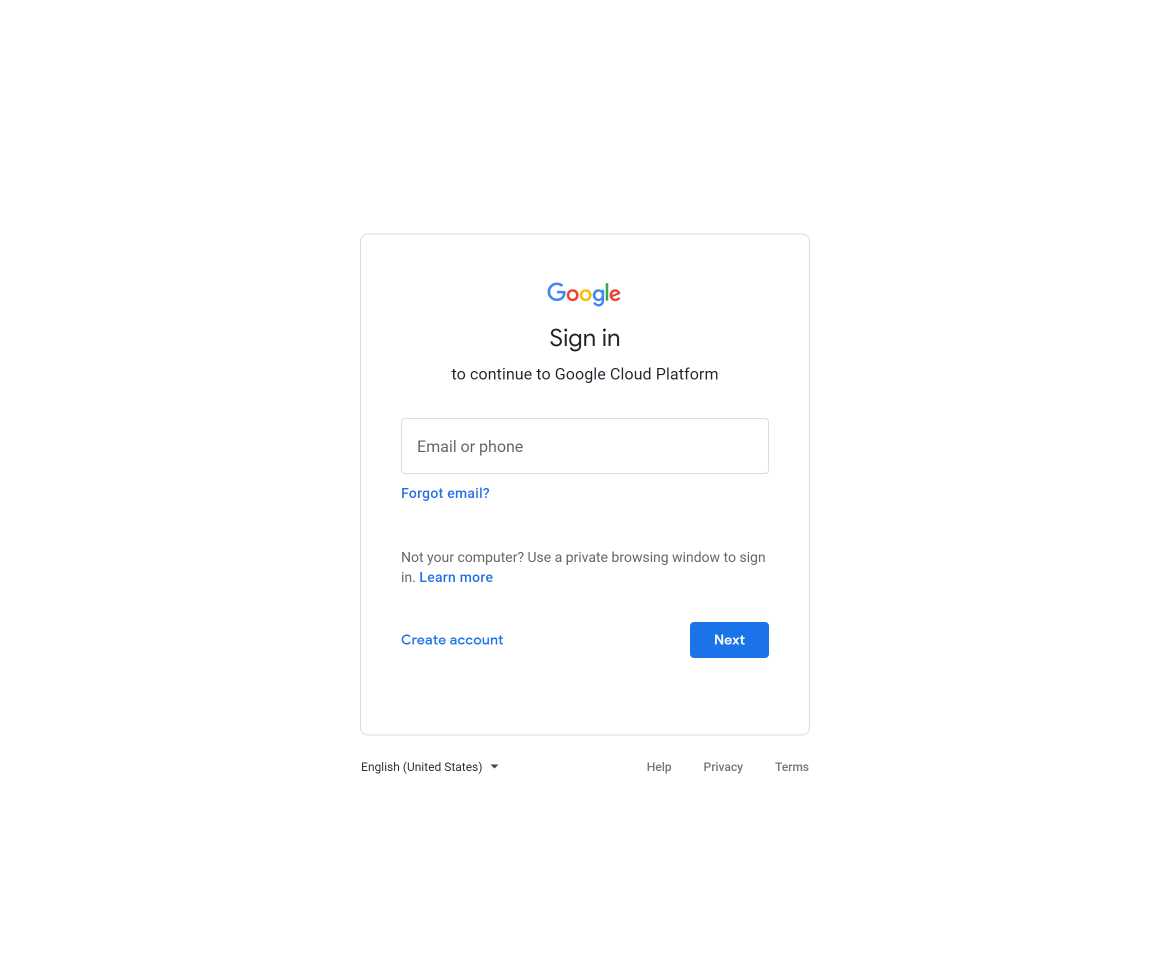
Create a google account if required
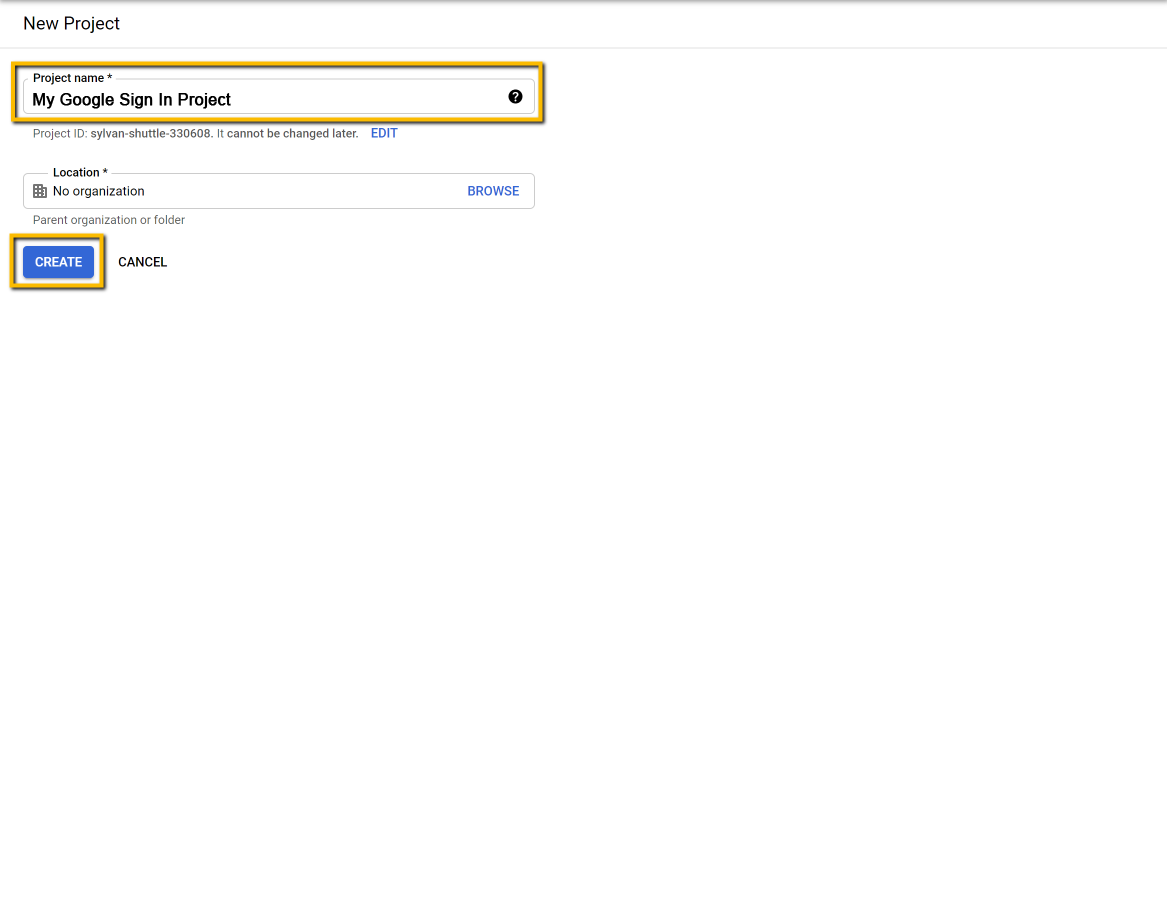
Create a project
New Projects
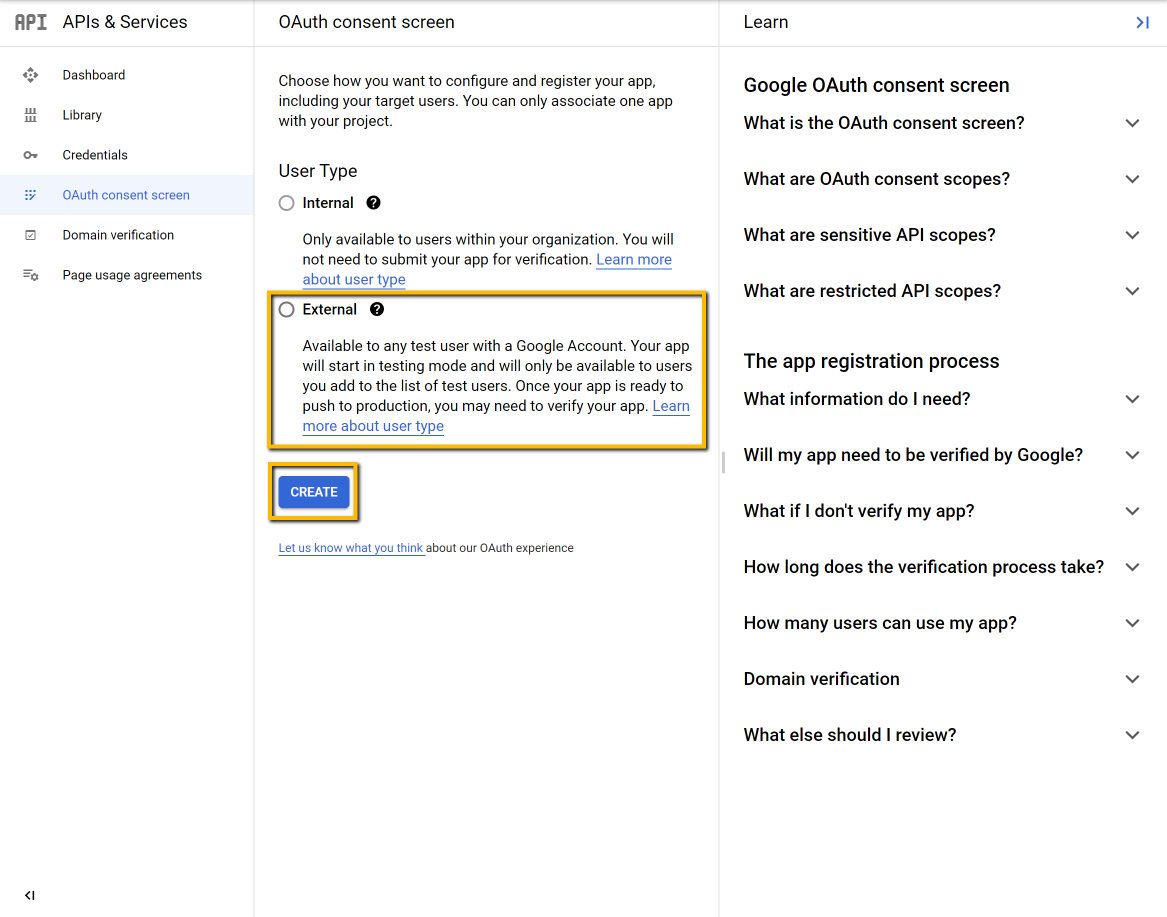
Configure Consent Screen
Set User Type External
App information
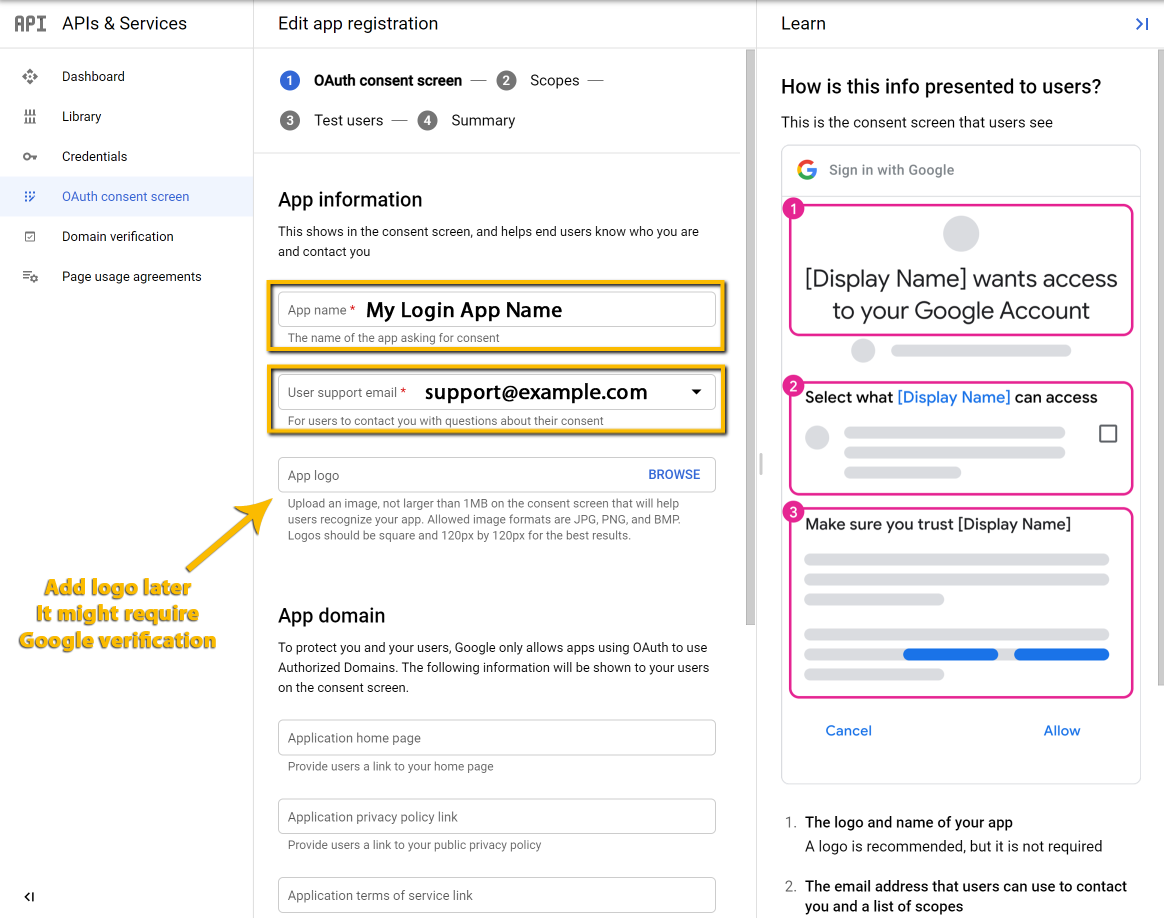
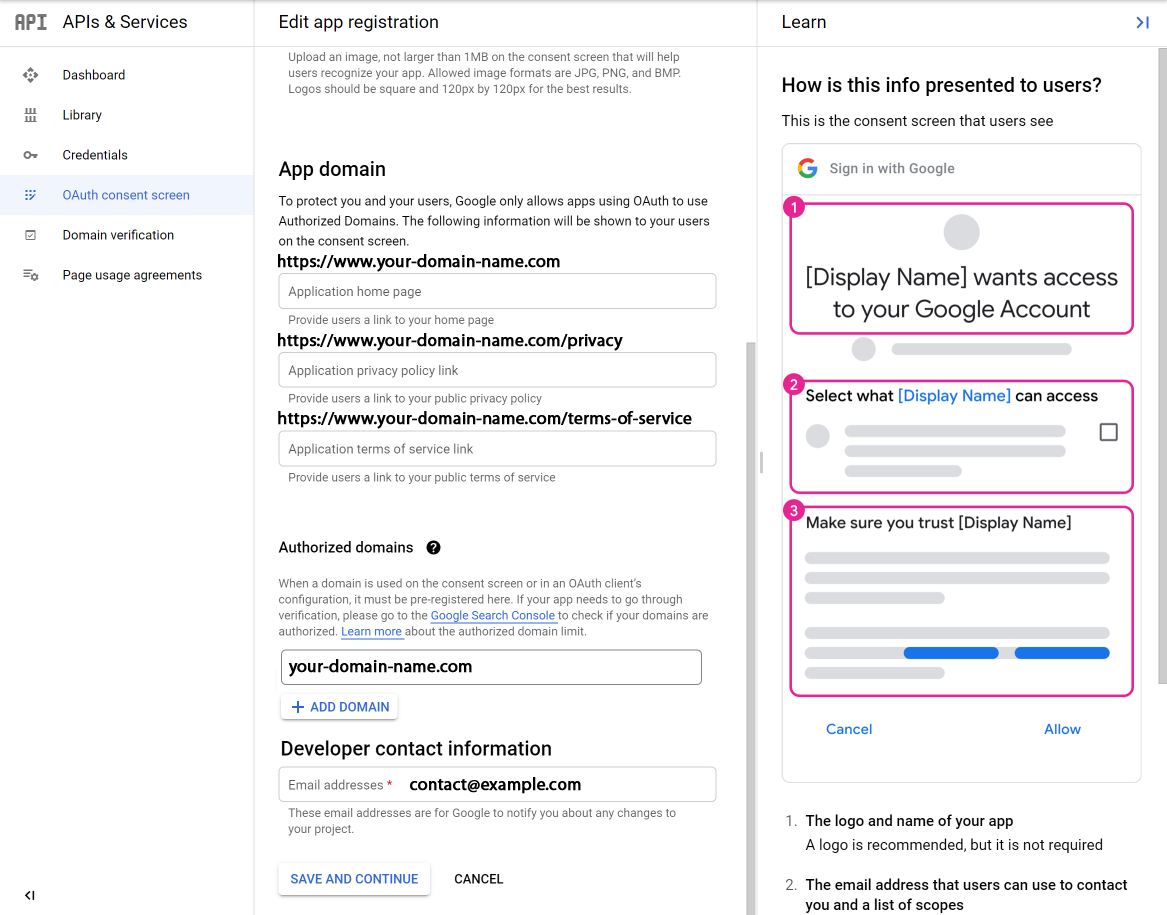
Data privacy, terms of service links, domain and developer email
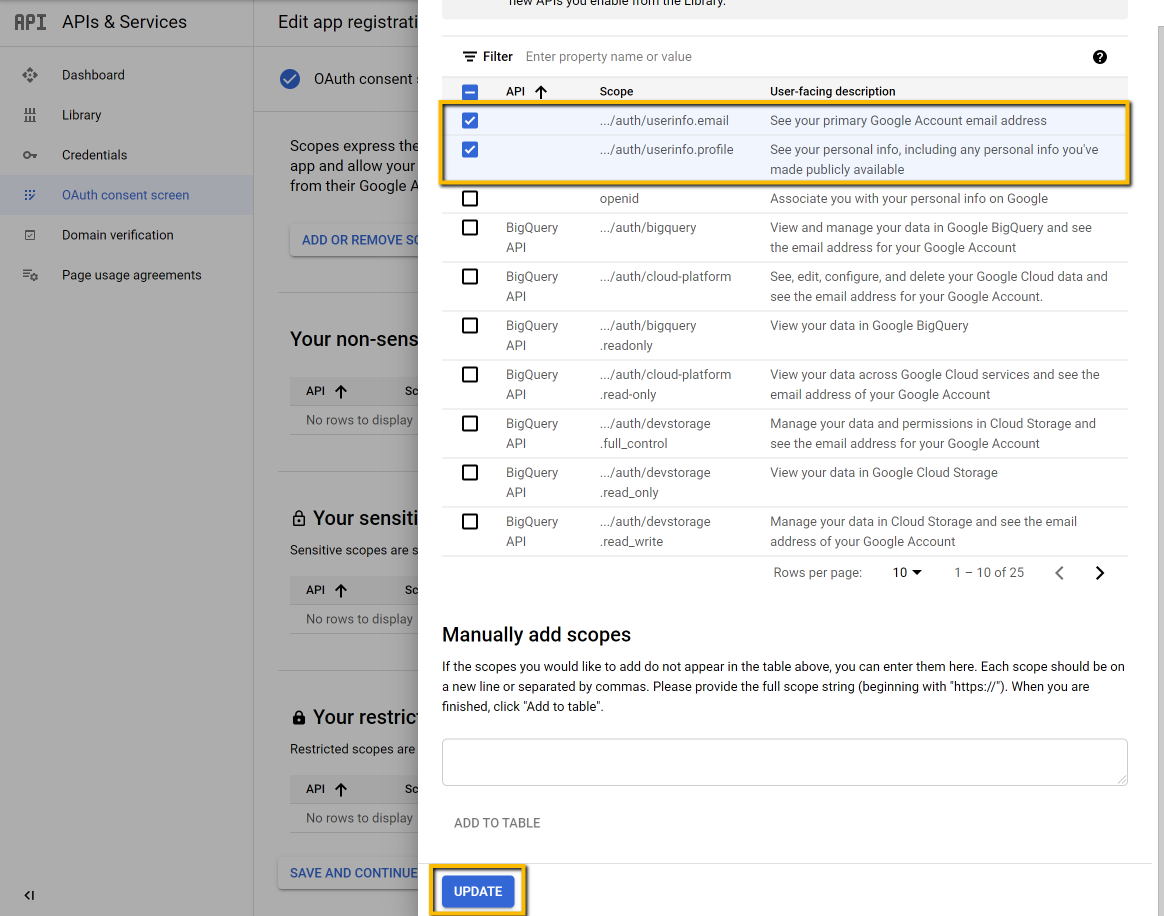
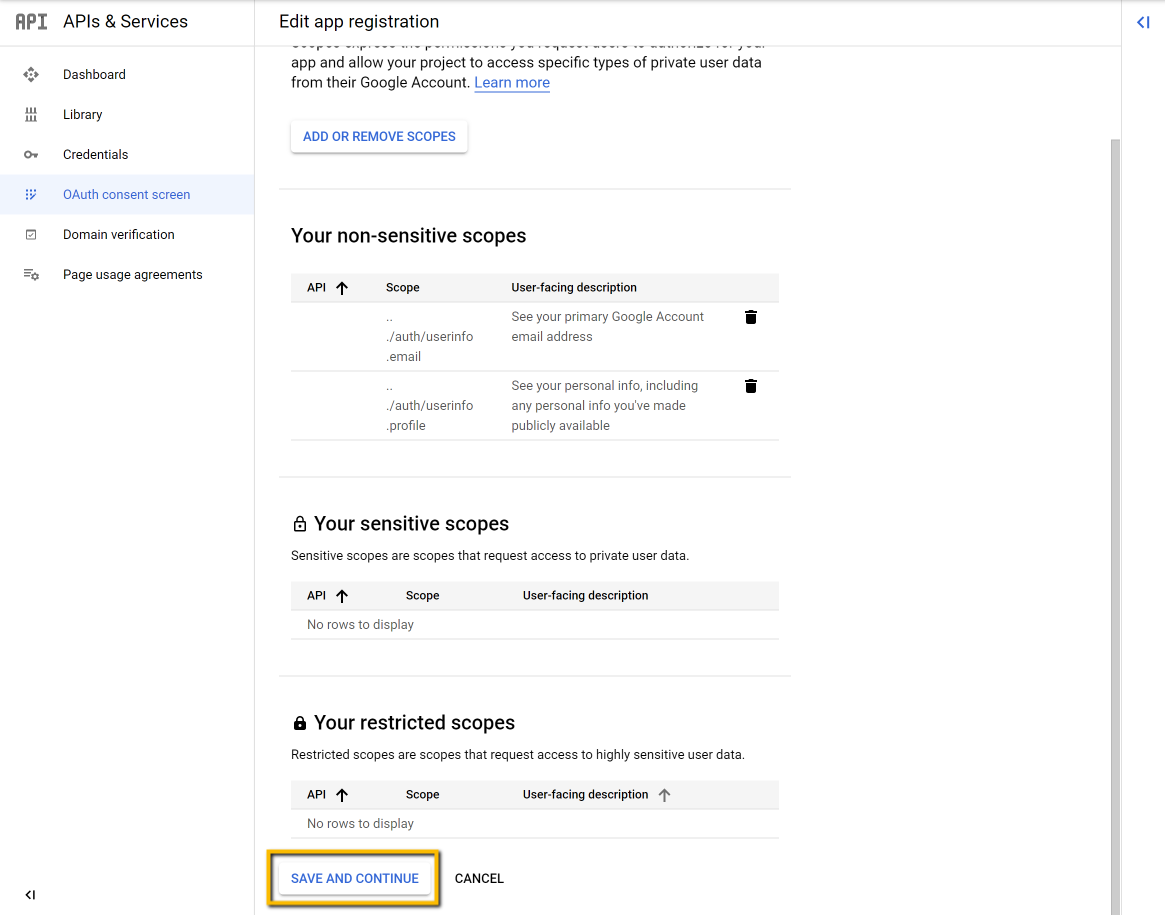
Add or remove scopes
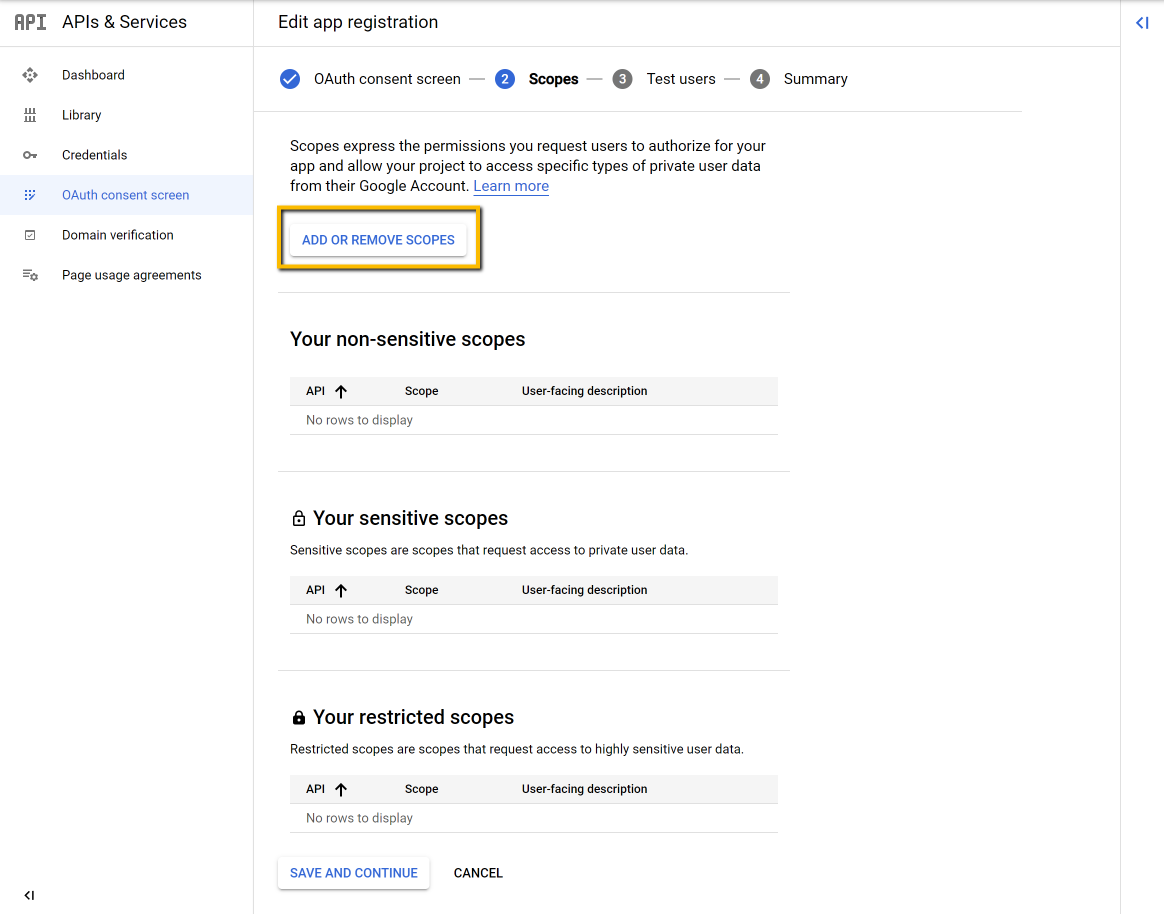
Select required scopes
Save and continue with selected scopes
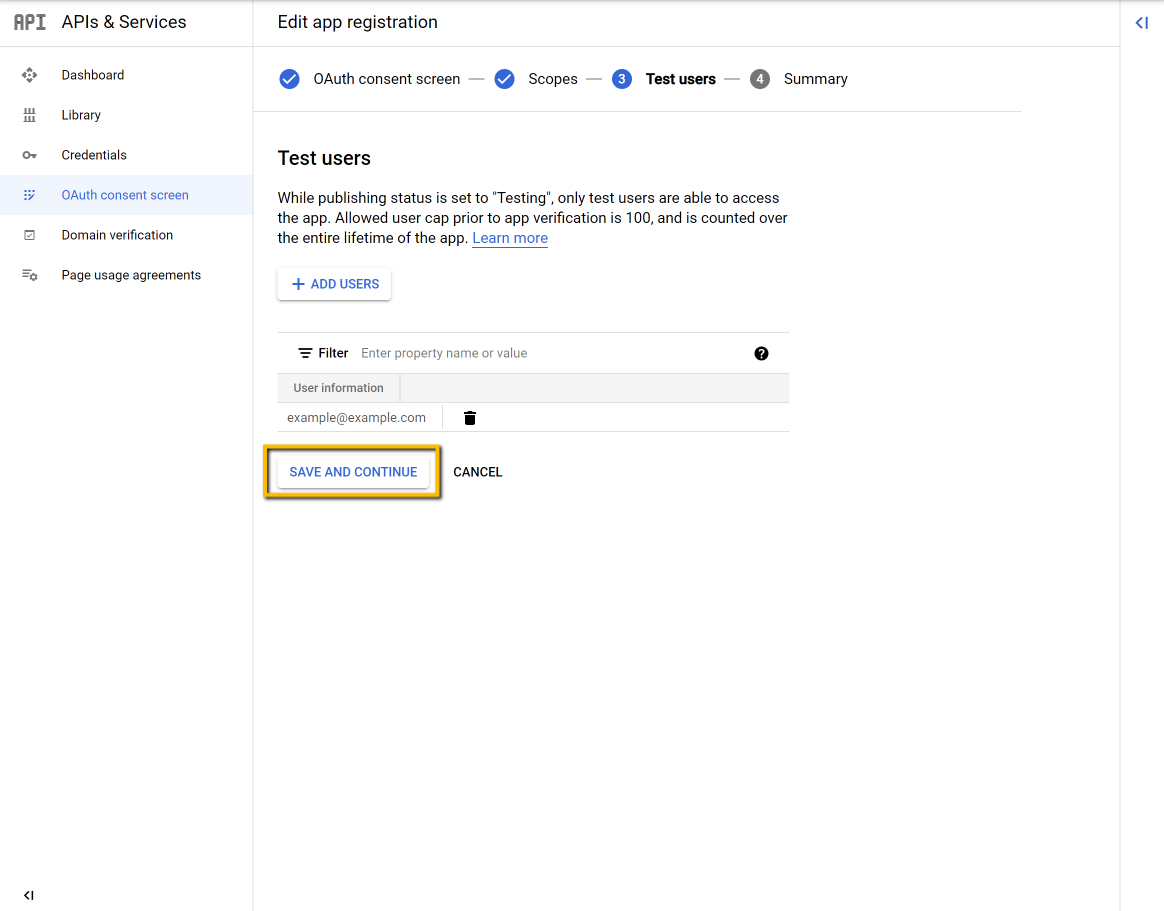
Add test user – step 1
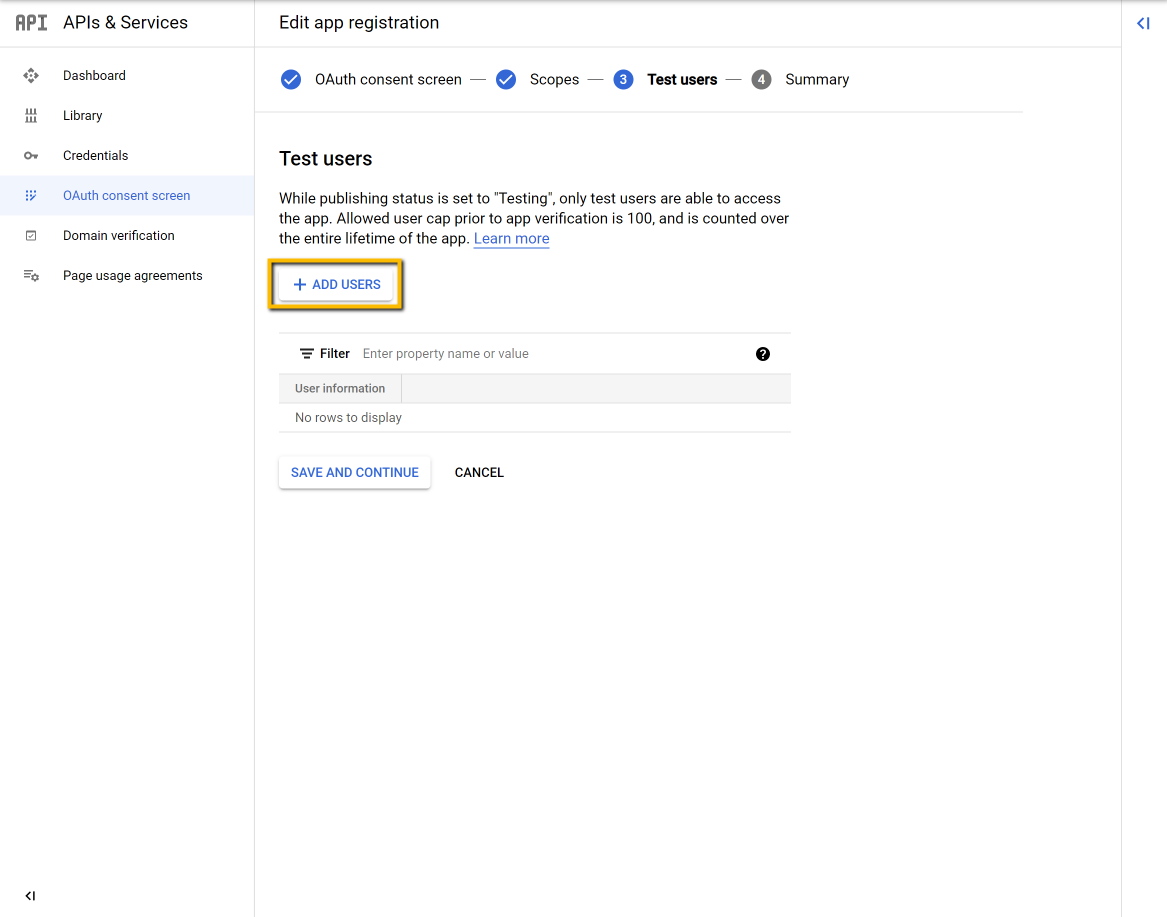
Add test user – step 2
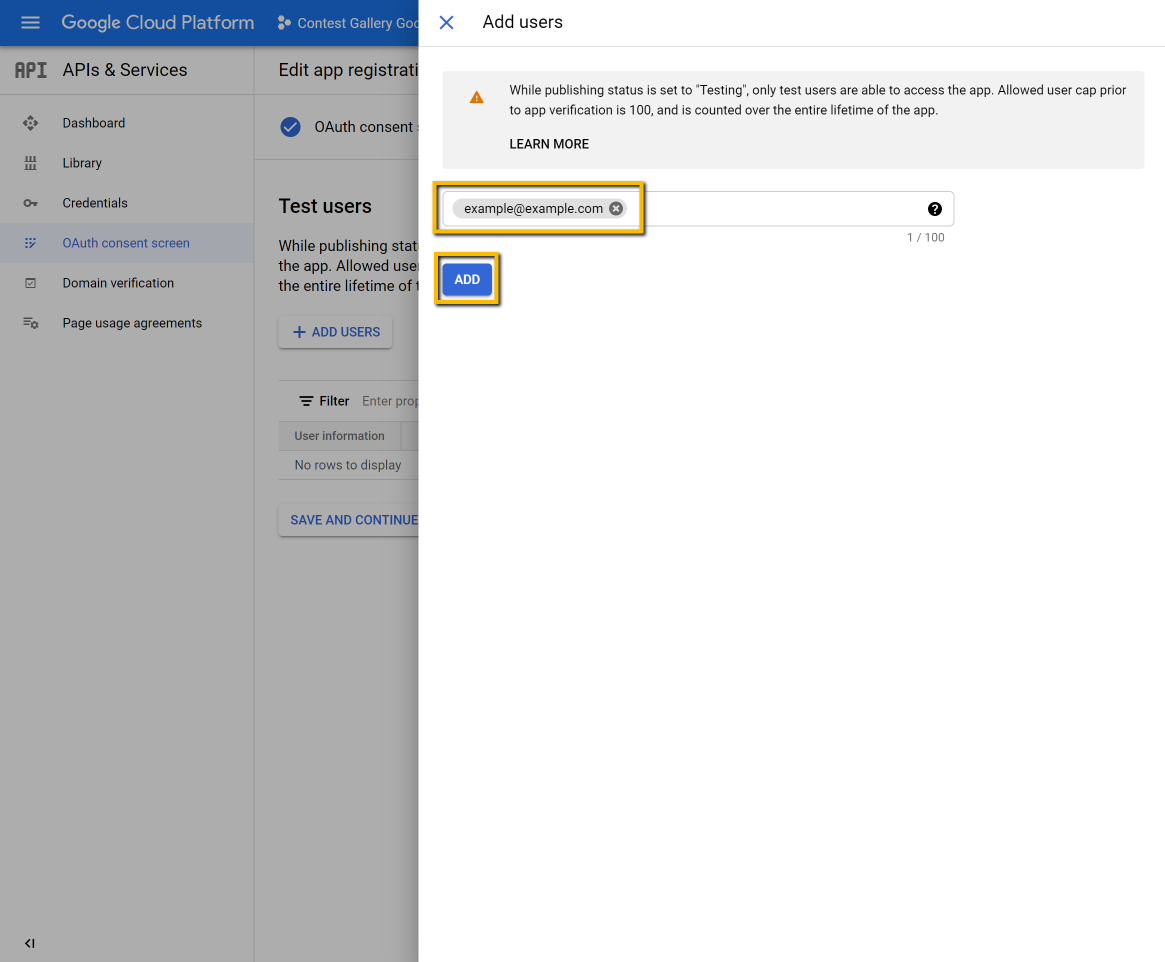
Add test user – step 3
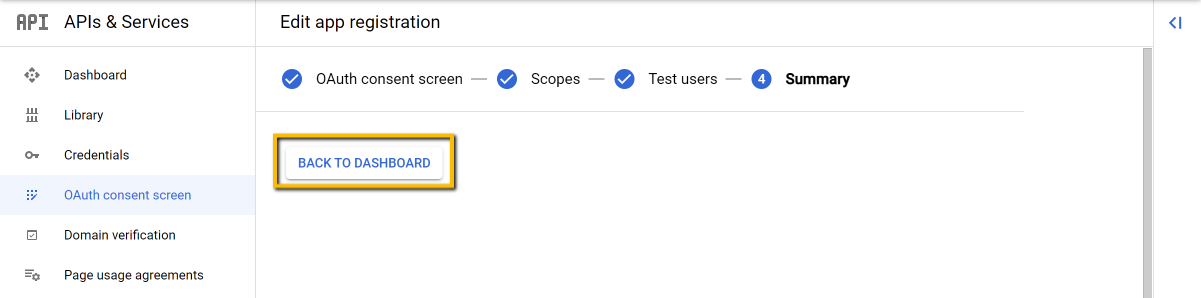
Edit app registration – Summary – Back To Dashboard
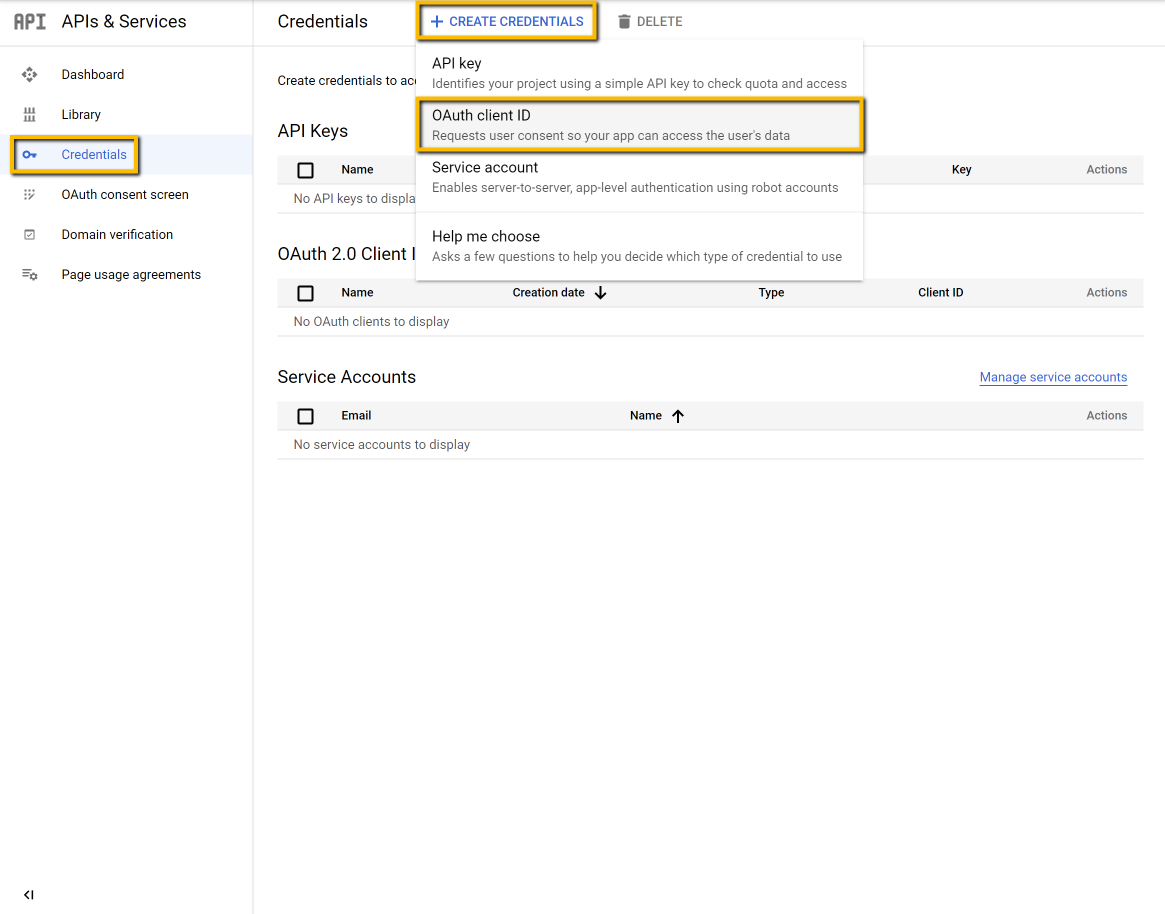
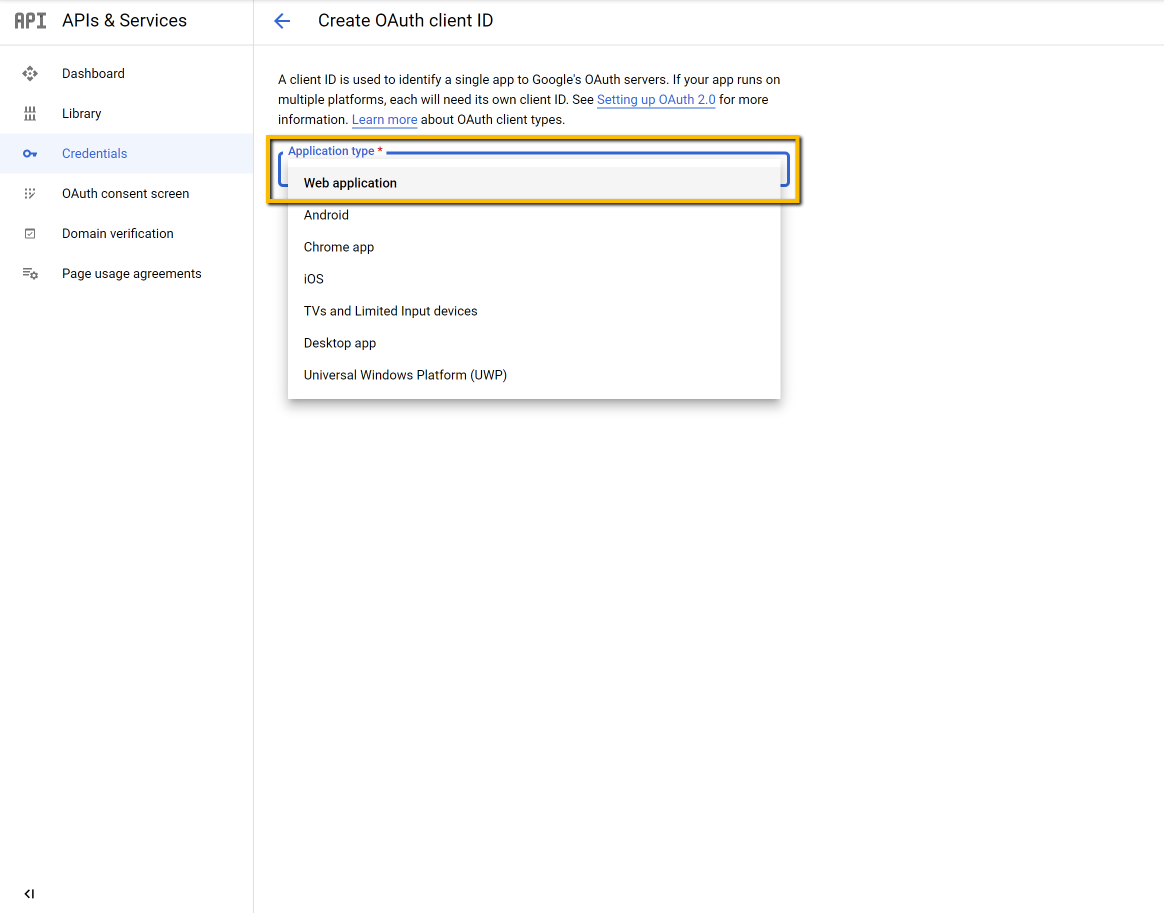
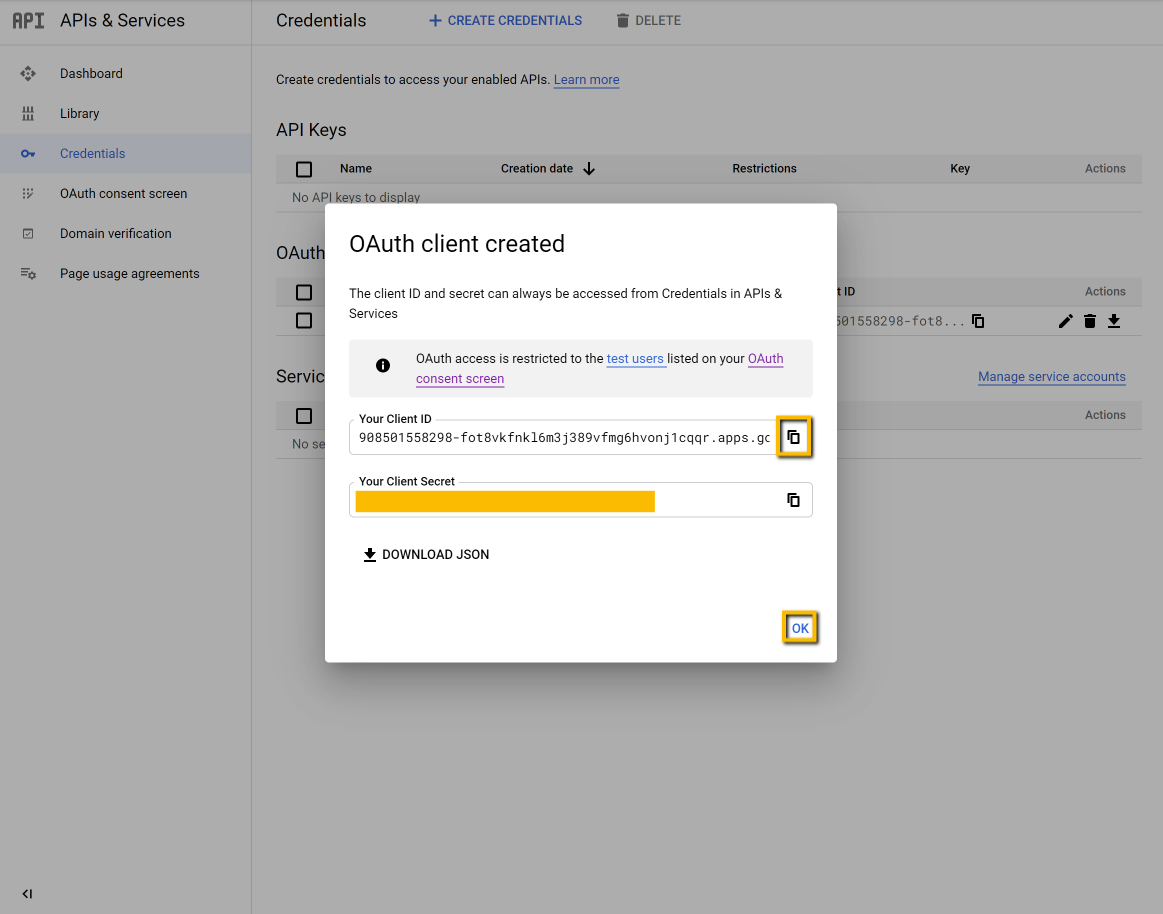
Create credentials OAuth client ID
Select “Web application”
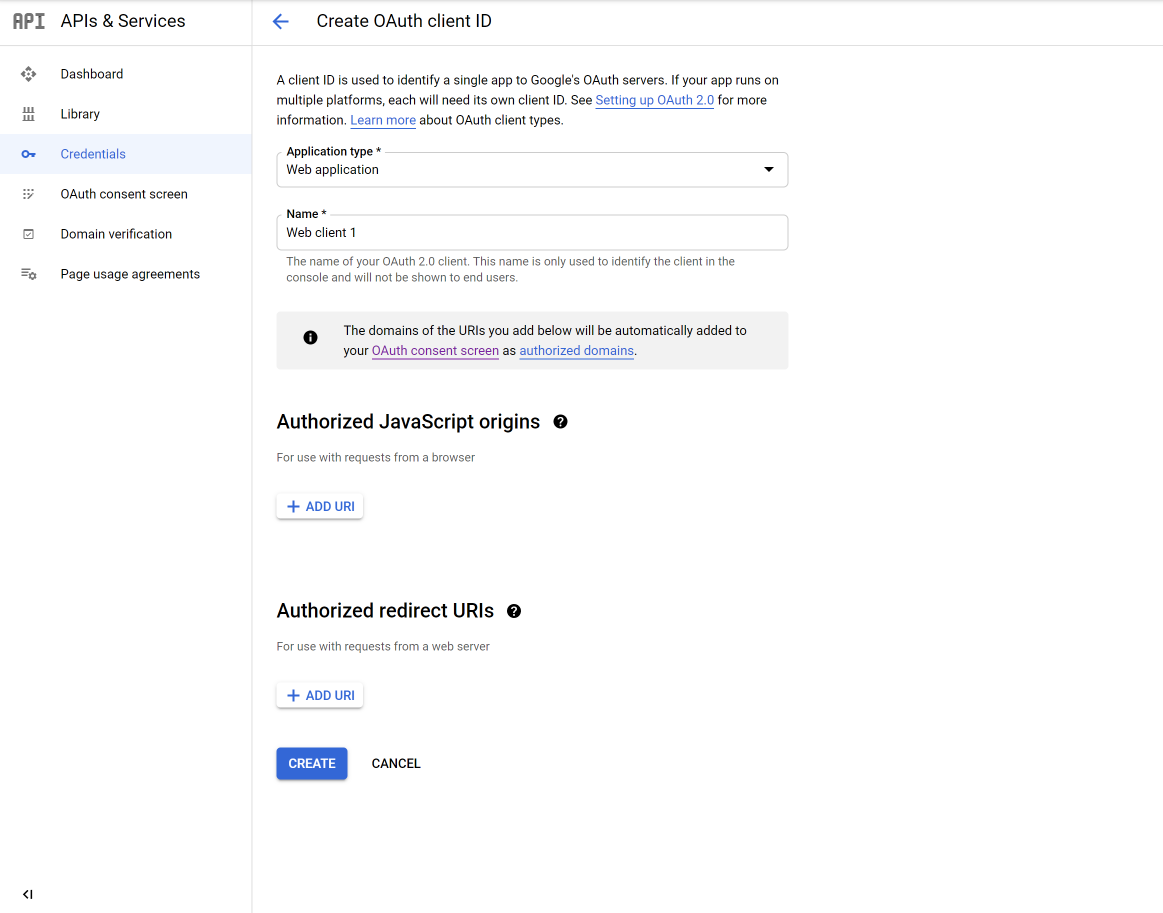
Add Web client name (just a name for orientation)
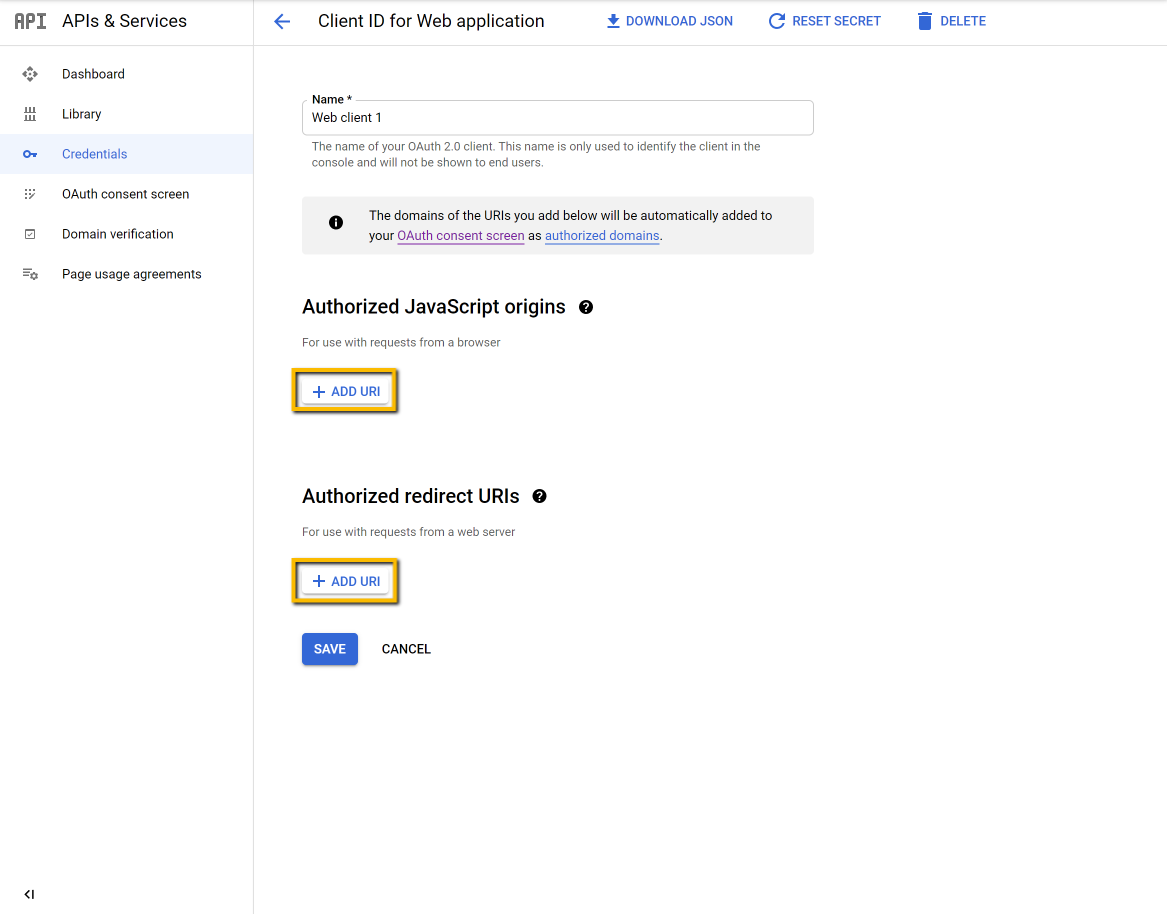
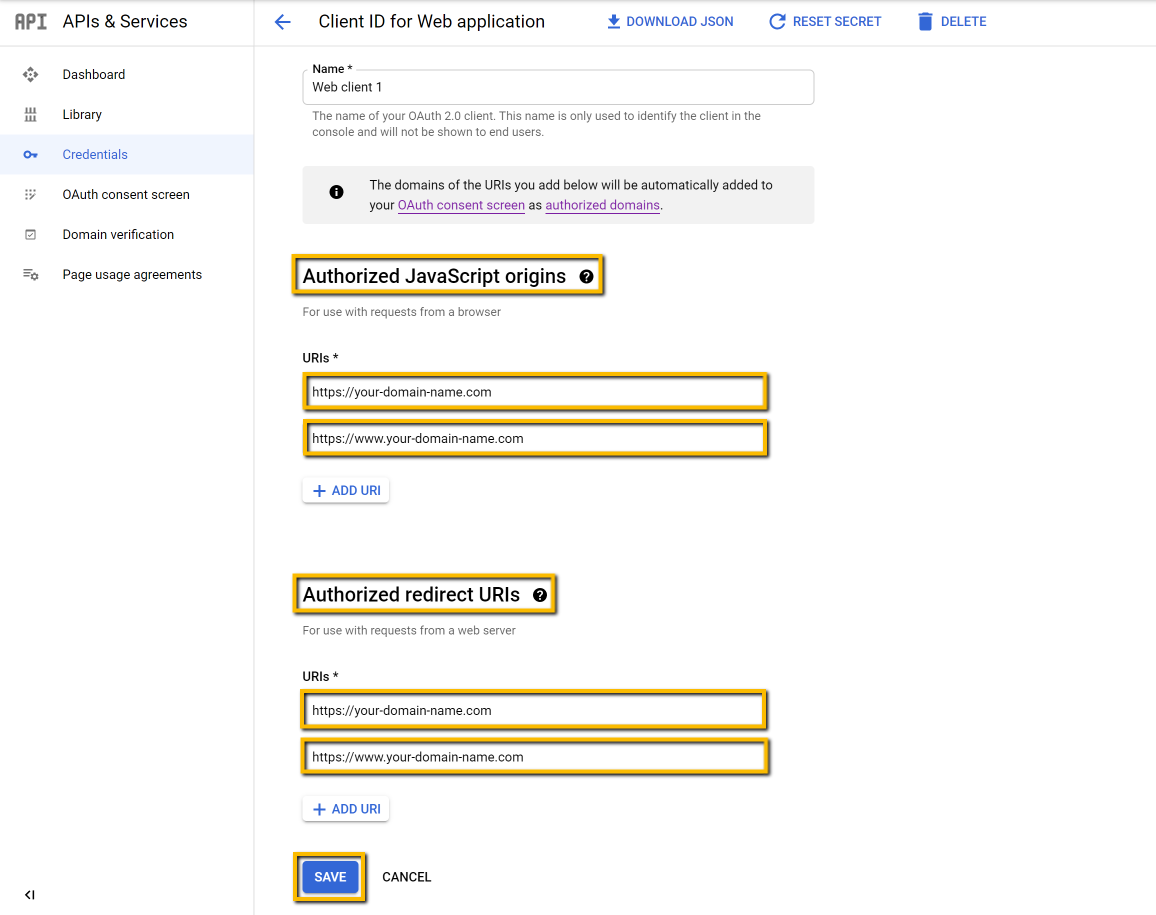
Add uris
Uris must be your domain name like in example.
Take care also that you use both variant “with www” and “without www” in case your website can be found/used both ways
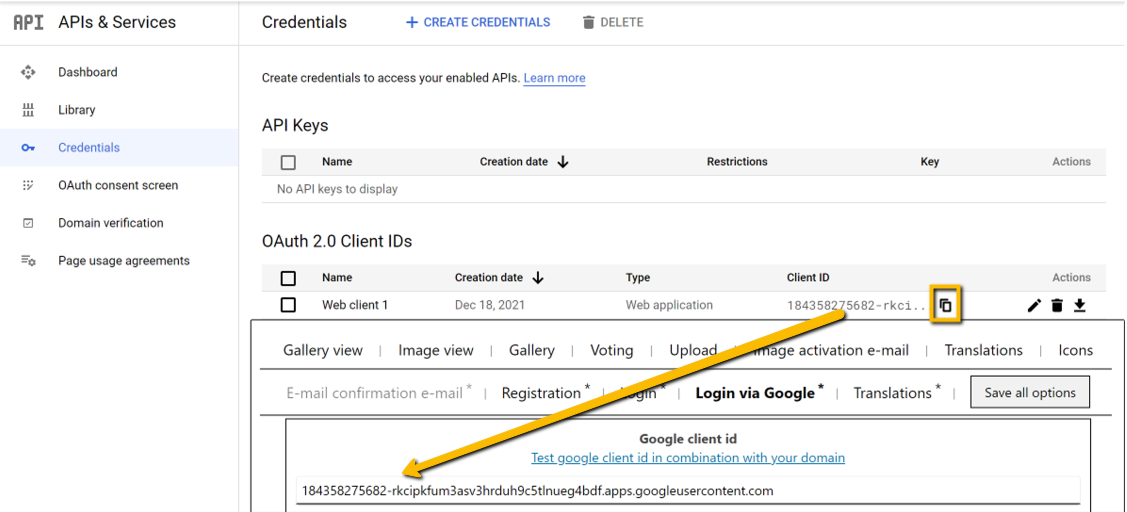
Client id is now available and can be added to Contest Gallery options
after Google sign in documentation is accomplished.
Publish App
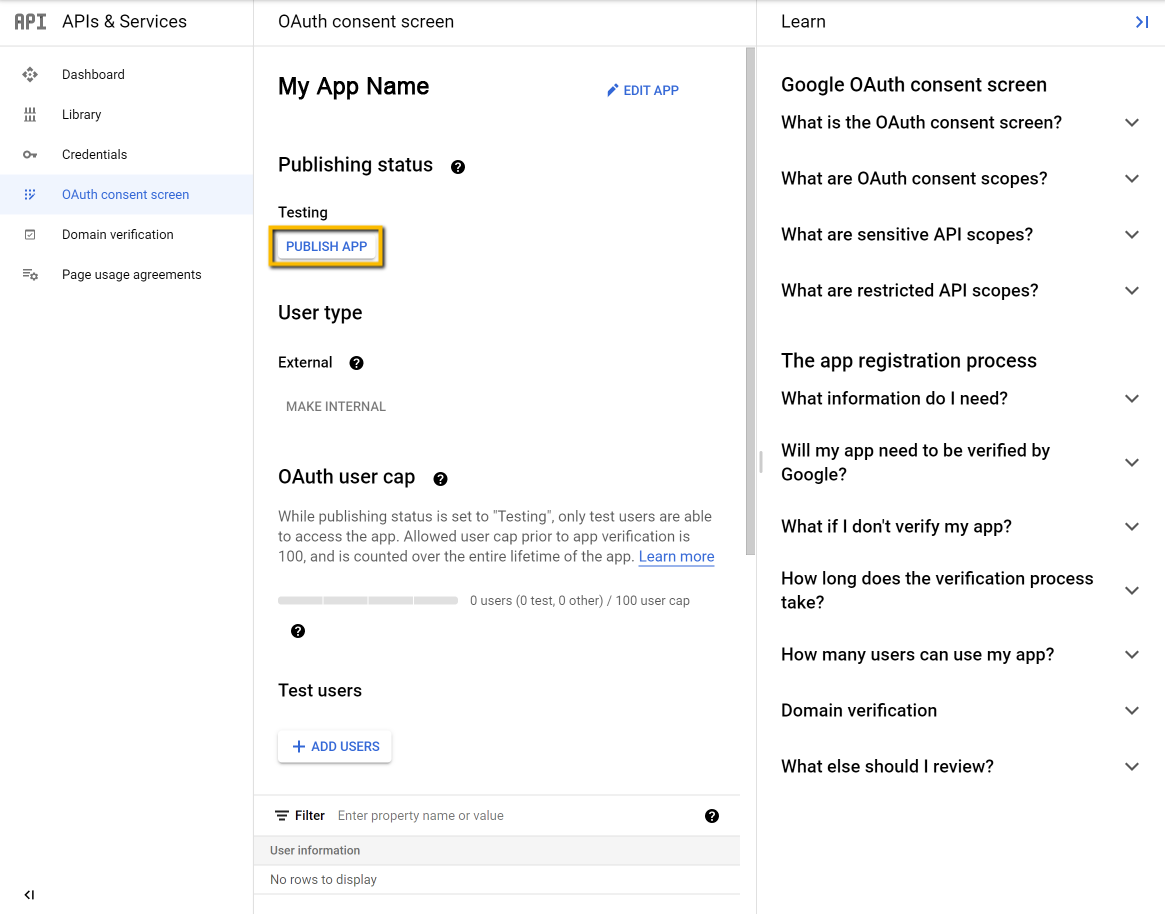
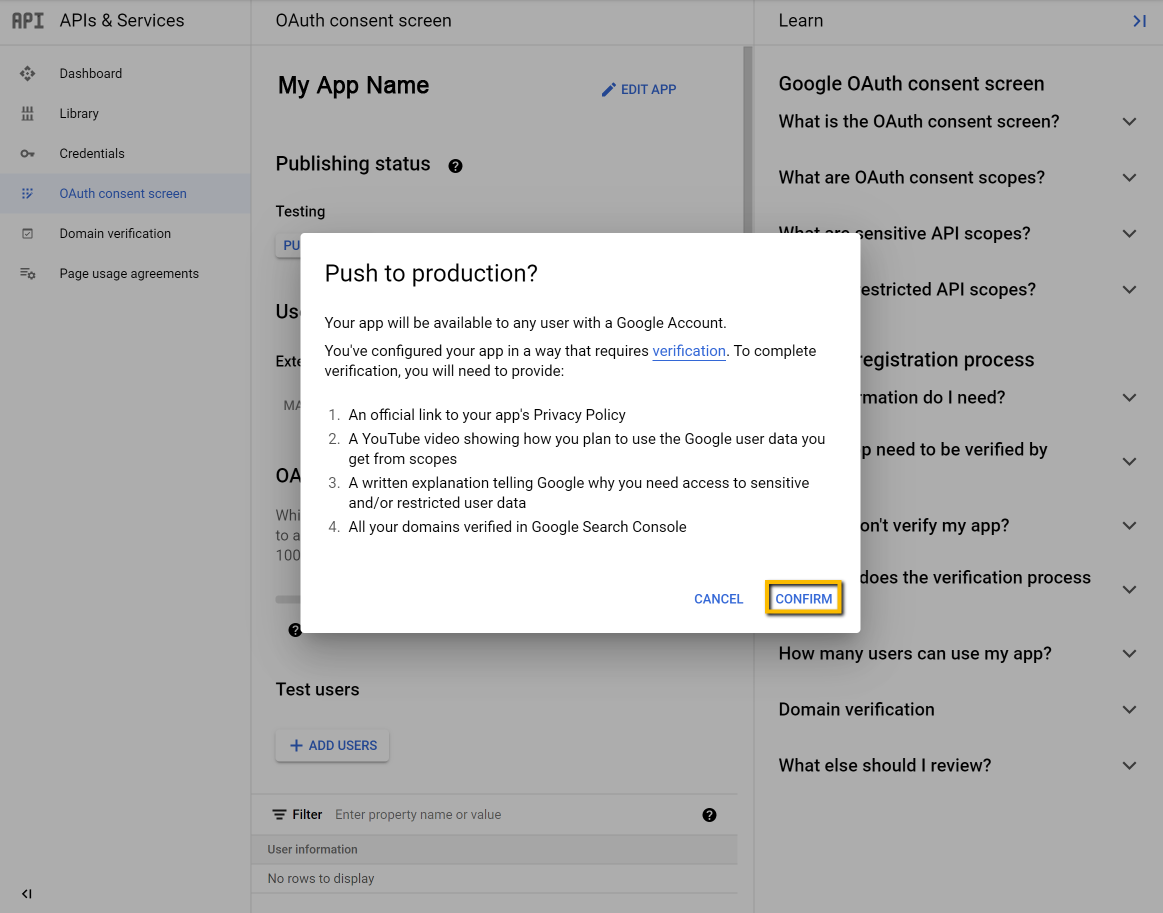
Push to production
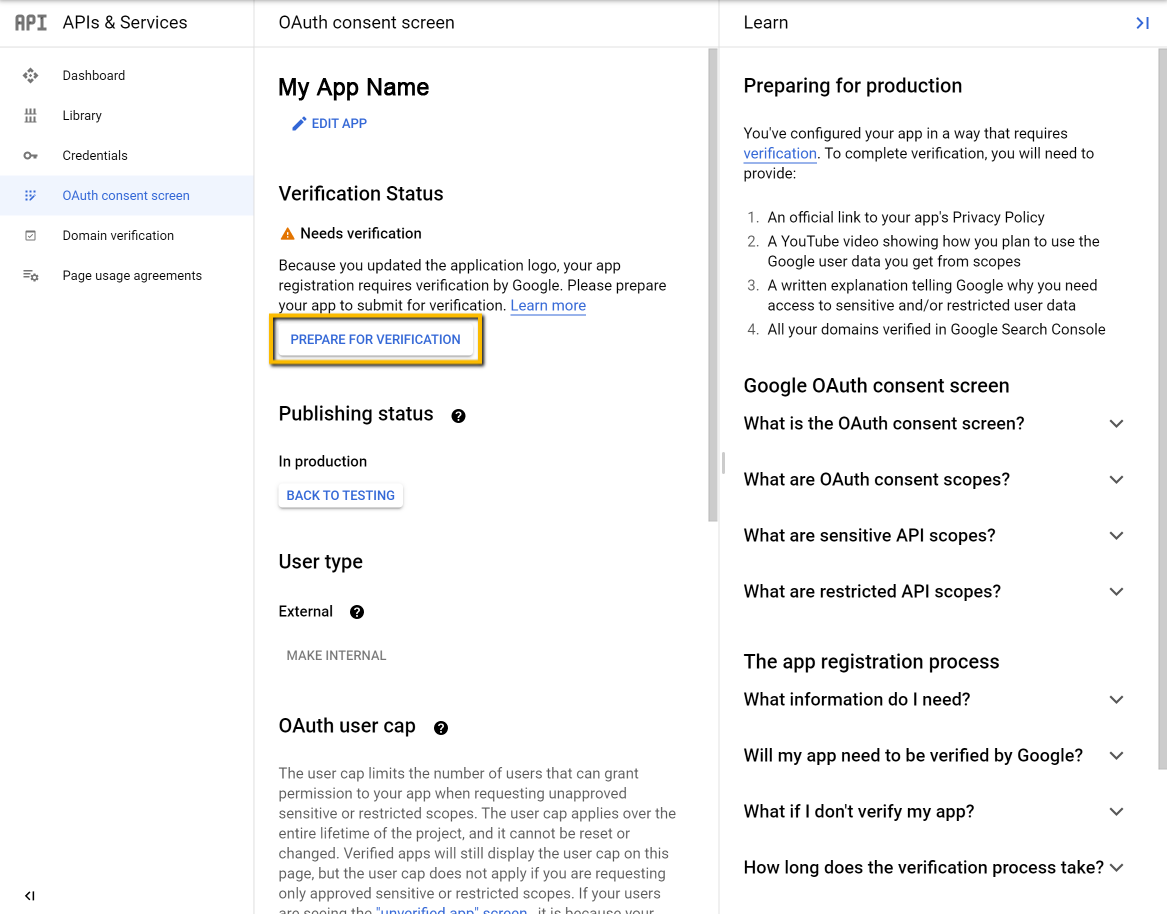
Eventually sidesteps required!
SIDESTEP 1: Prepare for verification (only required if you added logo)
SIDESTEP 2: Google has to verify that domain uris you use for app are really yours
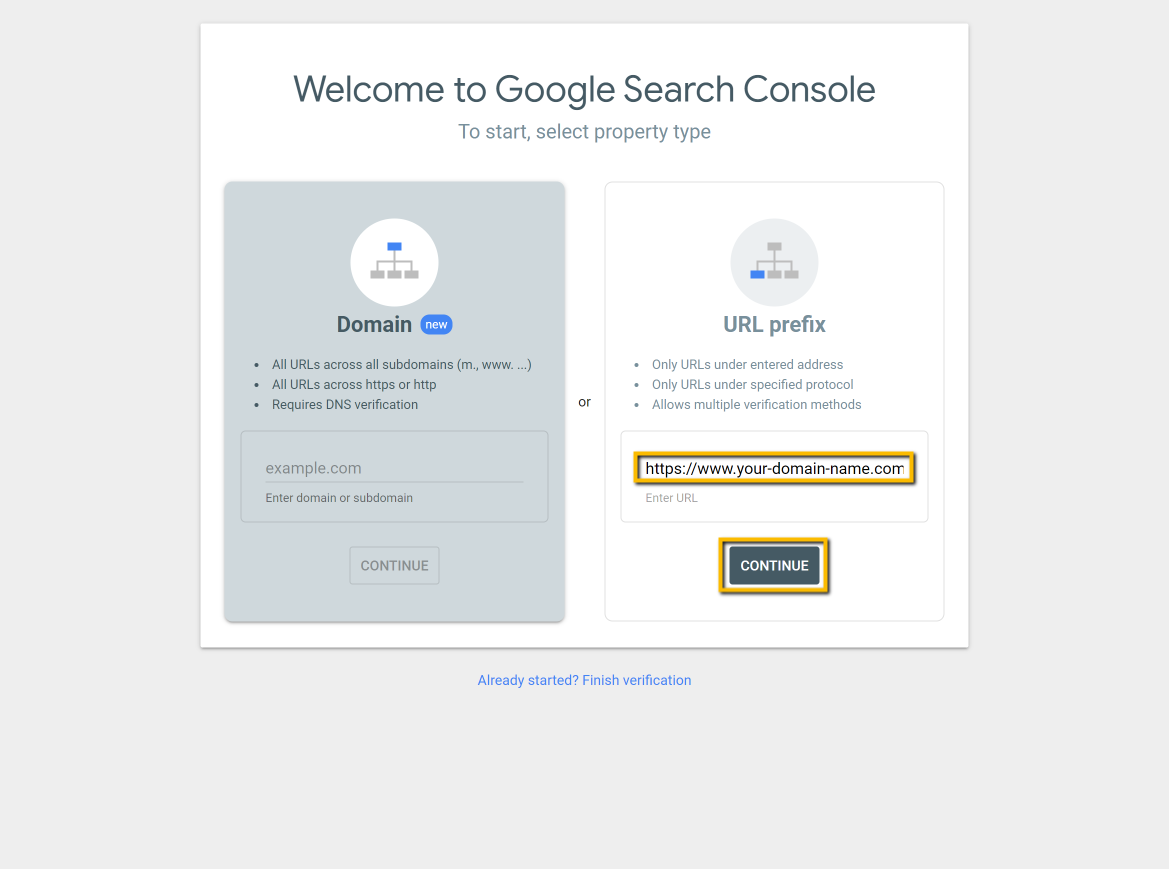
Use this link
search.google.com/search-console
to accomplish Google search console verification
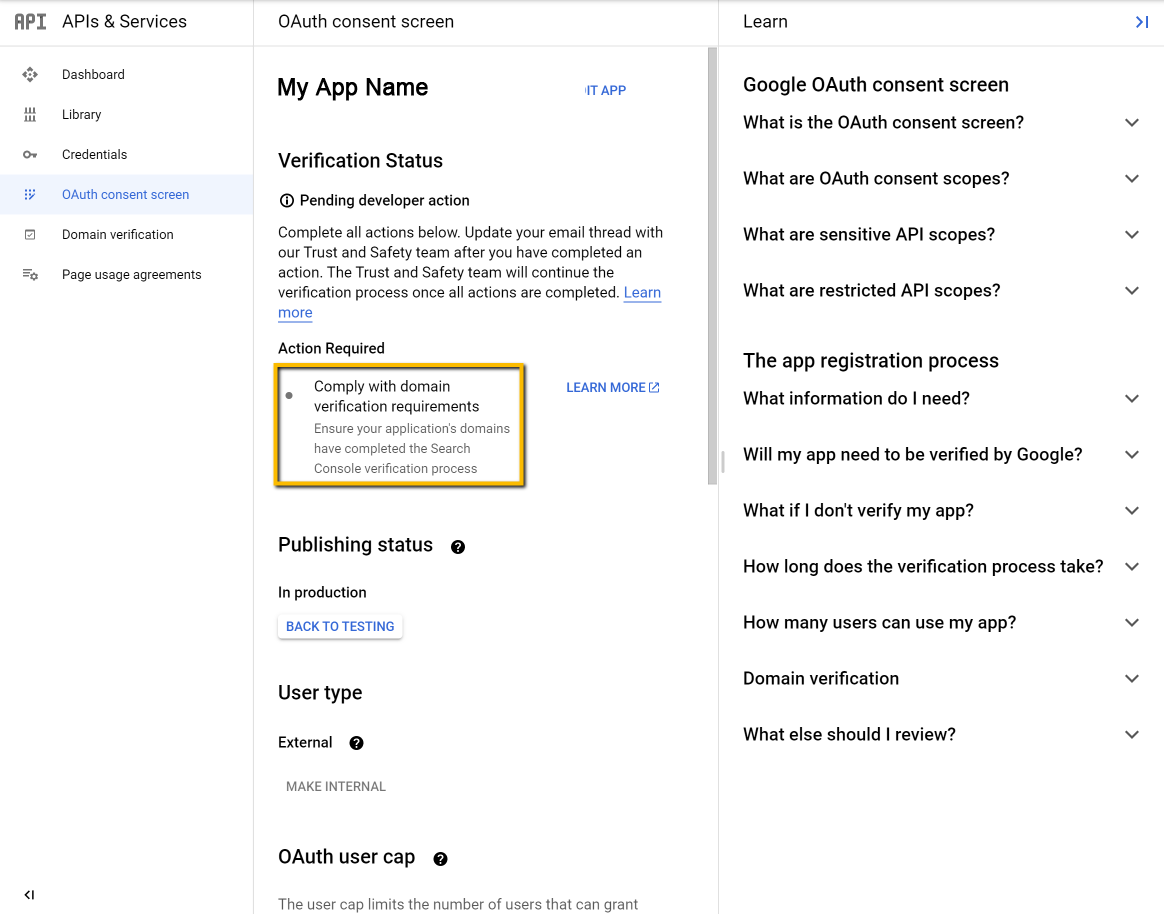
SIDESTEP 2: Google has to verify that domain uris you use for app are really yours
Verify via “URL prefix”. That’s the fastest and easiest way for most users.
SIDESTEP 2: Google has to verify that domain uris you use for app are really yours
Verify via “URL prefix”. That’s the fastest and easiest way for most users.
SIDESTEP 2: Google has to verify that domain uris you use for app are really yours
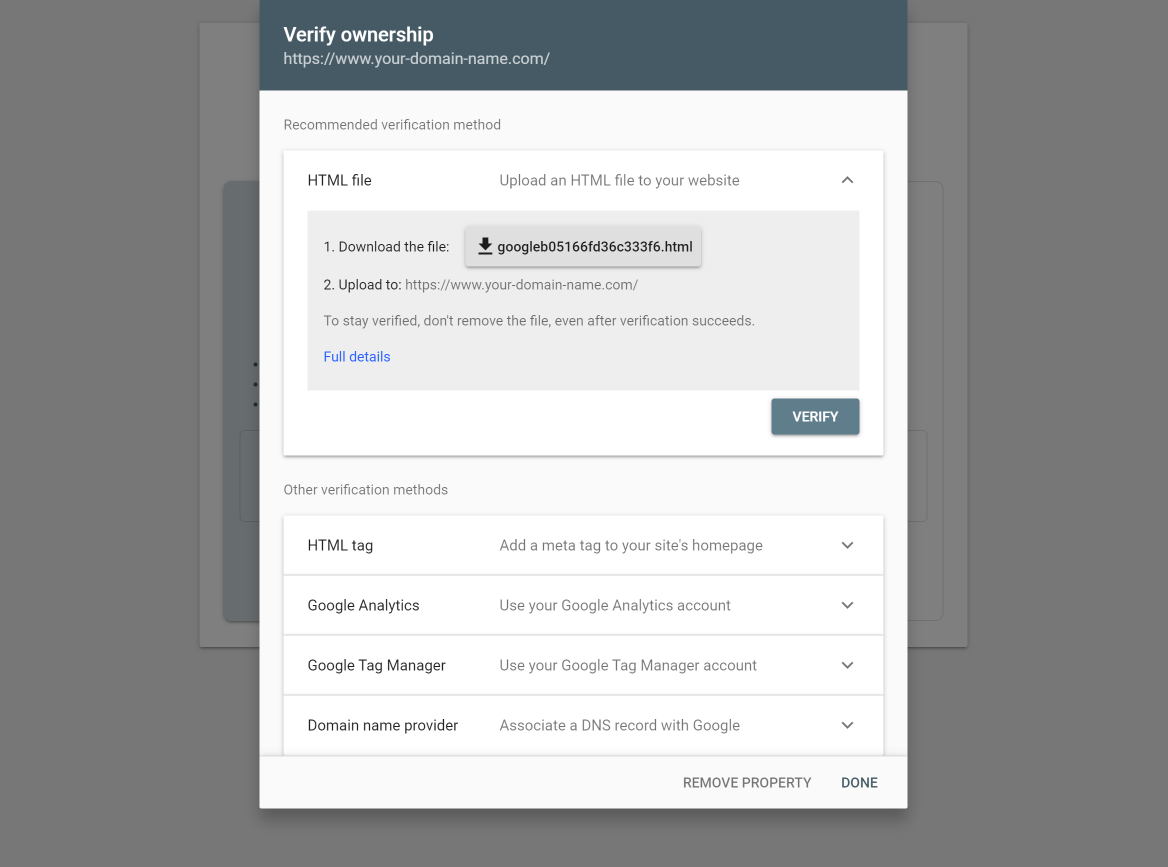
After you are verified you will see confirmation screen.
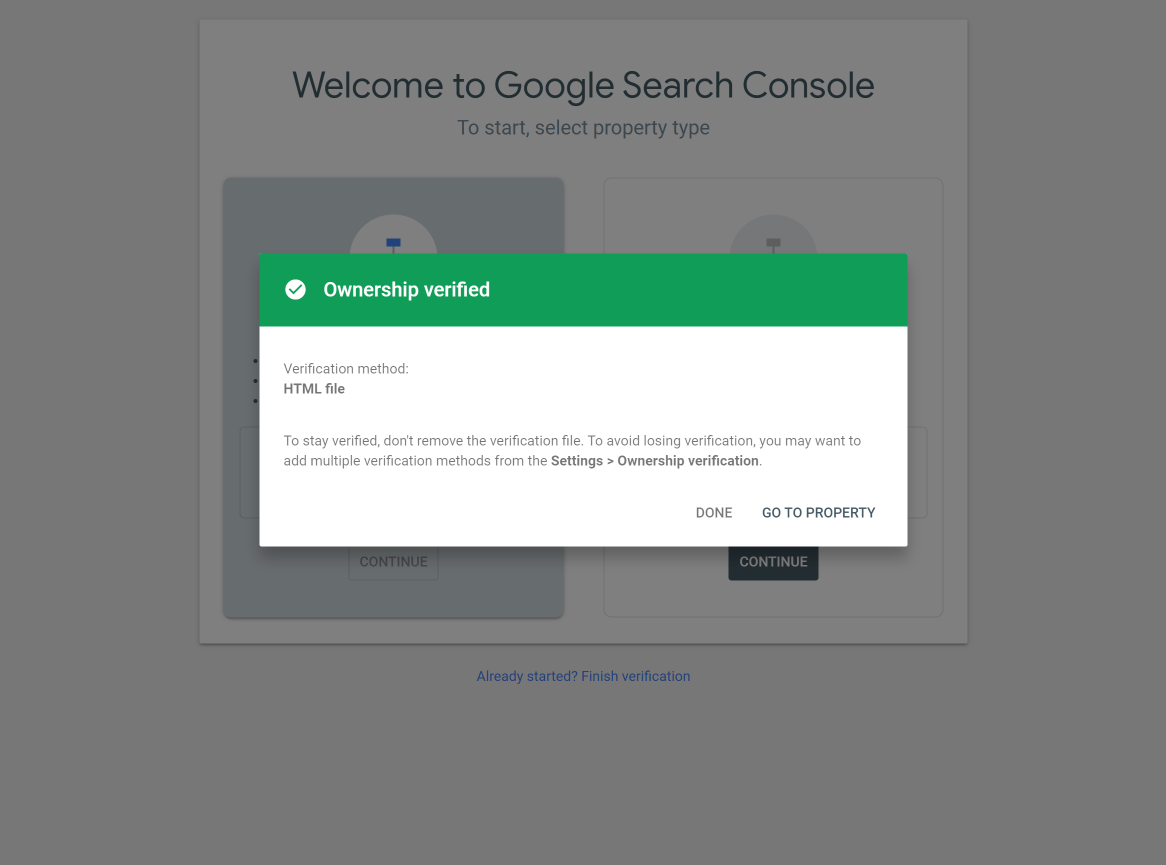
Congratulations!
You are now ready to use Google sign in!
Copy client id and put it in Contest Gallery options.
“Save all options”.
You can test your client id now.